How to Easily Deploy a Spring Boot Application on AWS Fargate

Before entering the AWS Cloud world, as a Java developer, it was often difficult for me to get Java-based applications online for my clients. Fortunately, I found out later that AWS provides many proven, fully managed services for deploying Java-based applications such as EC2, Elastic Beanstalk, Amazon ECS, etc.
In this post, we will show how to quickly deploy a Spring Boot Application on Amazon ECS with AWS Fargate deployment option. AWS Fargate is a Serverless compute engine that can be used to launch and run containers without having to provision or manage EC2 instances.
In the next lines, we will :
See how to create a Spring Boot REST API Docker image
Go through how to push a containerized API on the docker repository and deploy this containerized API on AWS
Create an ECS Cluster
Create a Fargate compatible Task Definition
Run the configured Task to make the application available online
Prerequisites
Have a Docker repository account
Install Docker Desktop on your local machine
Have an AWS account
Create a Spring Boot REST API
Through this section, instead of creating a Spring Boot Web application, we will create a Spring Boot Rest API for simplicity. Notice that the deployment process is the same even for Spring Boot Web App and Spring Boot REST API. For demonstration purposes, you can clone the Git hub repository here and open it in your favorite IDE.
Create a Docker container image for the Spring Boot Application
1. Create a Docker file
In the project root, create a docker file named: Dockerfile (with no file extension). Paste the below content:
FROM openjdk:11
COPY ./target/docker-demo-0.0.1-SNAPSHOT.jar docker-demo-
0.0.1-SNAPSHOT.jar
CMD ["java","-jar","docker-demo-0.0.1-SNAPSHOT.jar"]
EXPOSE 8080
Line 1: Instruction to build docker image from openjdk:11 image
Line 2: Instruction to copy the jar file into the Docker container file system while building
Line 3: is a java command to launch the jar file while executing the container
Line 4: informs Docker that the container listens on 8080 port at runtime.
2. Build the Docker image
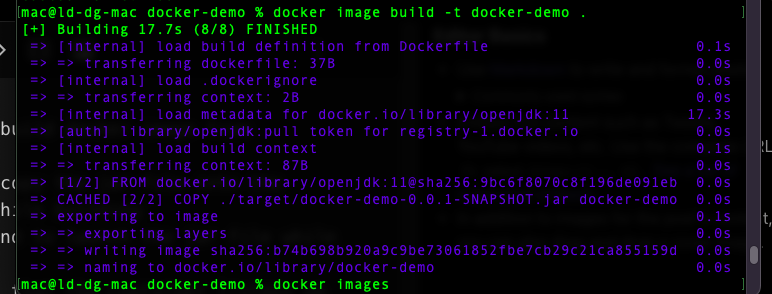
Open the terminal and execute the following docker command in the project root:
docker image build -t docker-demo .
You should have a result like this:
3. Test the docker image locally
Open the terminal and execute the following command:
docker container run --name dockerDemoApp -p 8080:8080 -d
docker-demo
Go to Docker Desktop, you should see this:
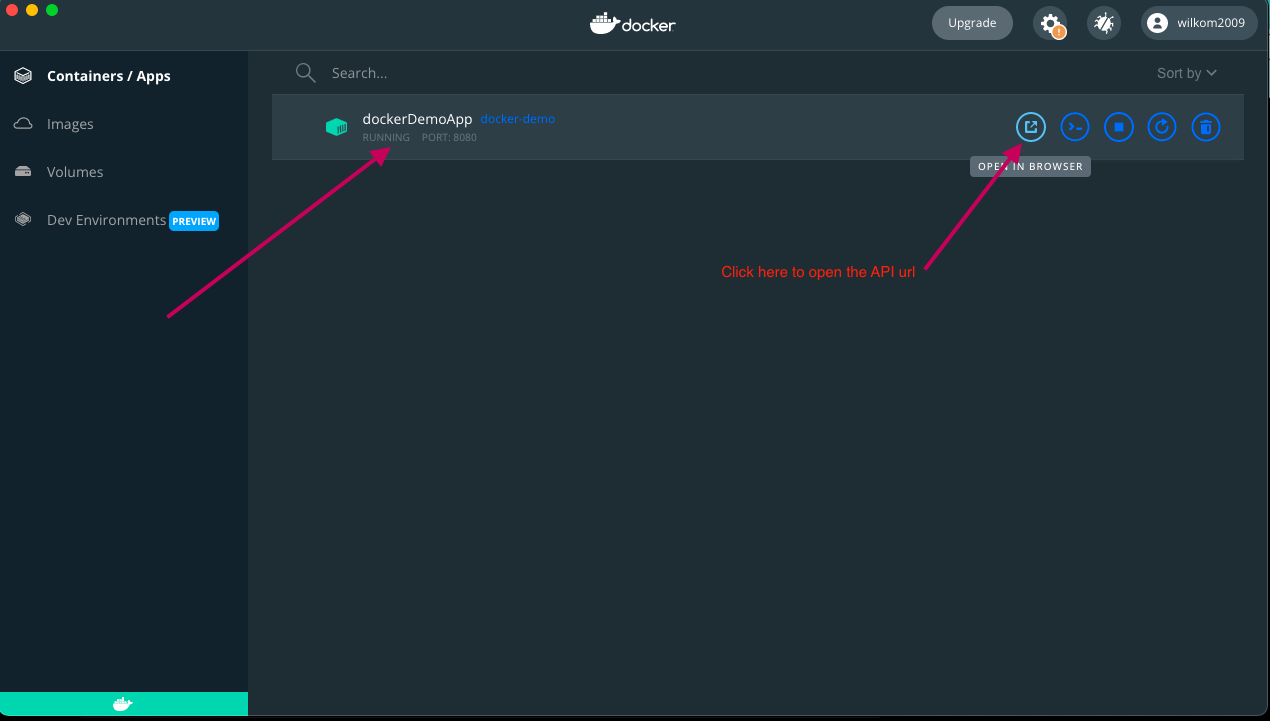
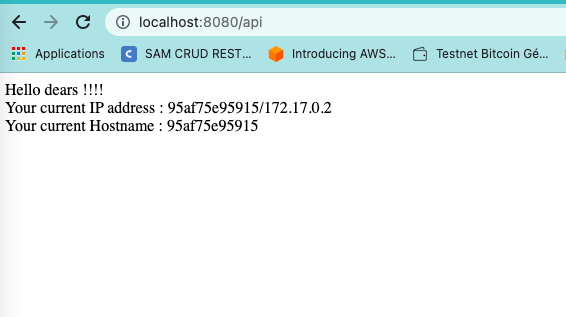
You can then paste this link http://localhost:8080/api/ in the browser to get the following result :
4. Push Docker image into Docker hub repository
In order to push the Docker local image into the Docker hub repository, you just need to execute the following command line:
docker push xxx/docker-demo-app:latest
Make sure to replace xxx with your user name.
Deploy the Spring Boot REST API on AWS Fargate
In this section, we will work step by step to finally get the REST API online.
1. Create Amazon ECS Cluster
- Sign in to the AWS Console, and type ECS in the Search bar.
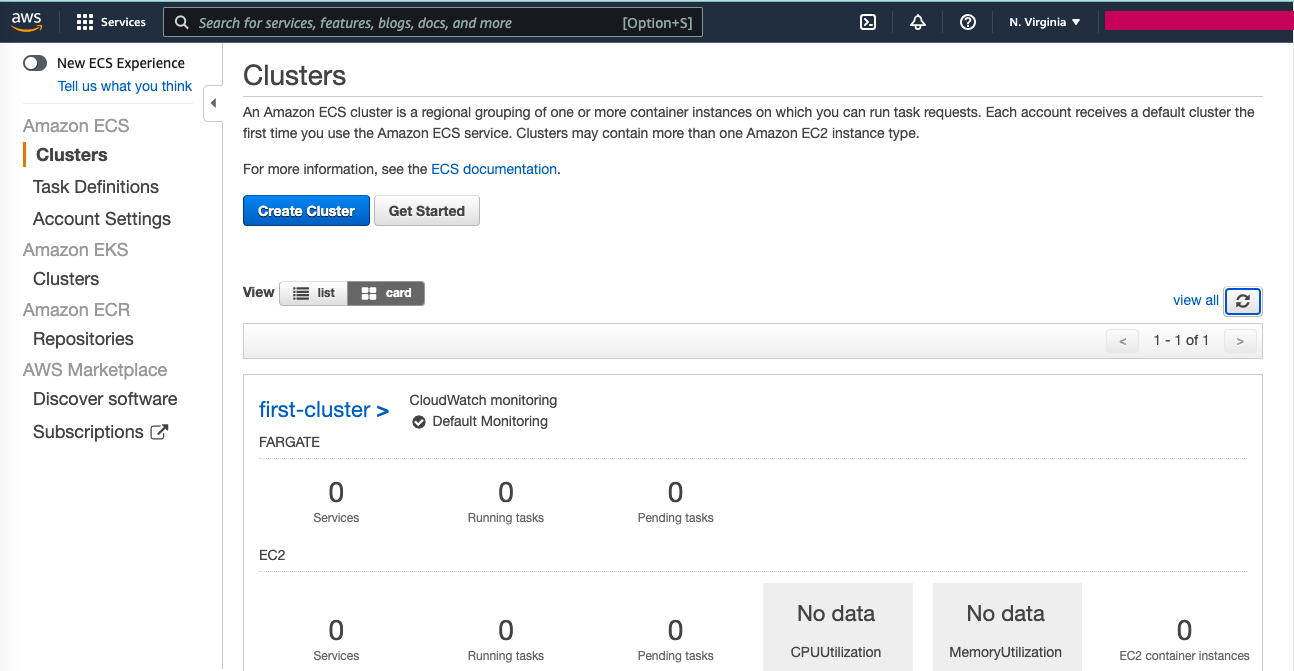
Click on Create Cluster
Step 1: On Select cluster template step, select Networking only option and click on Next Step
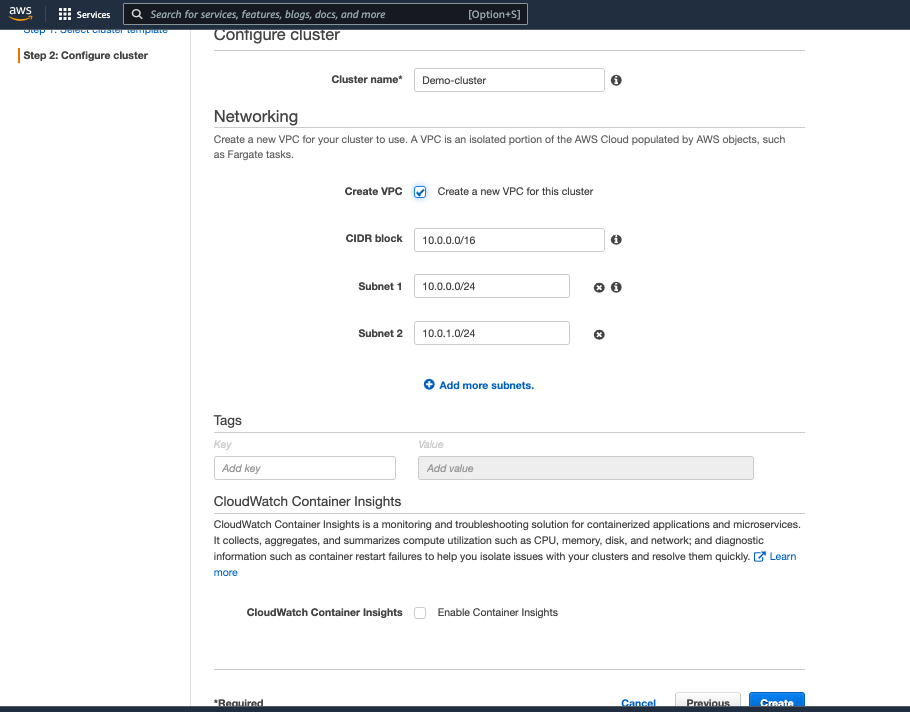
Step 2: Provide the Cluster name : Demo-cluster, check Create VPC option, leave all other default options and click on Create.
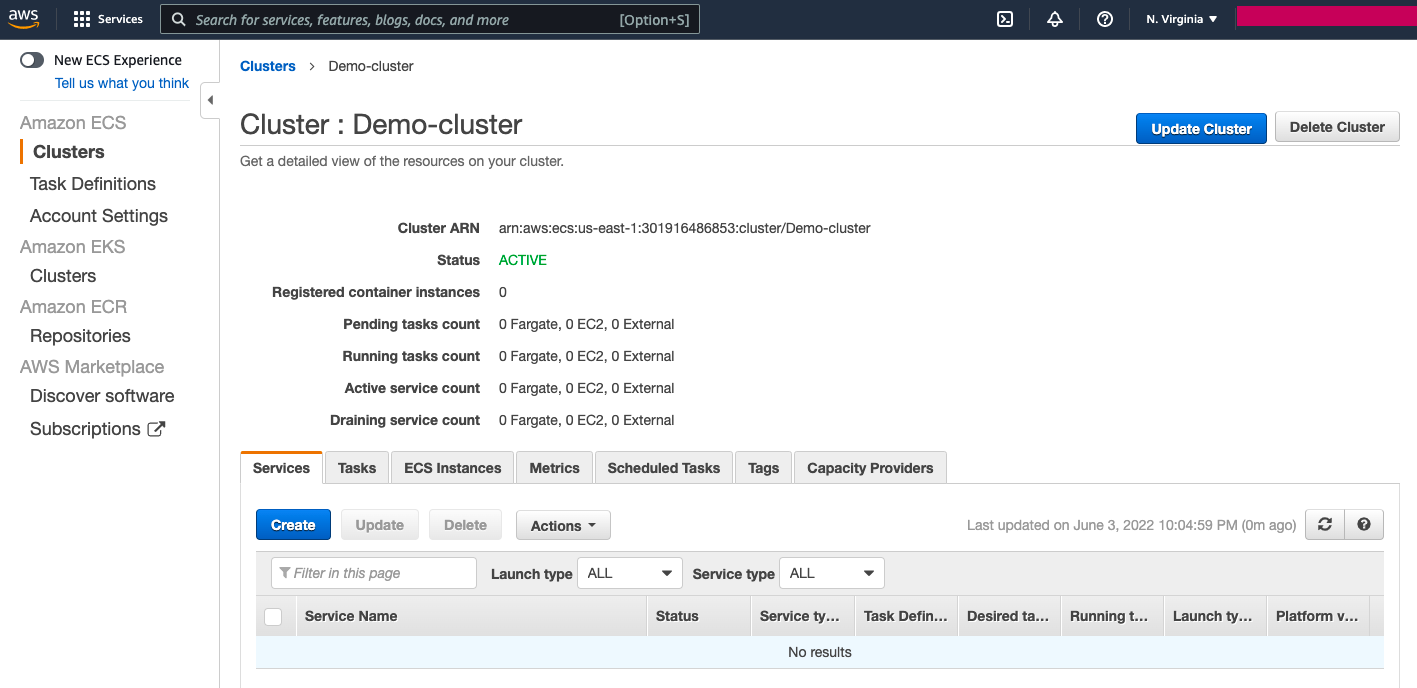
- Click on View Cluster, and the Demo-cluster details should look like this:
2. Create a Task Definition
On the left side, click Task Definitions and Create new Task Definition to access the Create new Task Definition page.
a. Step 1: Select launch type compatibility
- Select FARGATE then click on Next Step
b. Step 2: Configure task and container definitions
- Type the Task definition name : docker-demo-task
- Leave Task role as is (an IAM role for ECS Task definition will be created on your behalf )
- Select Linux as Operating system family
- Task execution role, leave Create new role option
- Task memory (GB) : 1GB
- Task CPU (vCPU) : 0.5vCPU
- Click on Add Container, and the information below:
-- Container name : dockerDemoApp
-- Image : xxx/docker-demo-app:latest, the Docker hub image repository (xxx : your Docker hub user name)
-- Memory Limits (MiB) : Soft limit : 128
-- Port mappings : 80 -> tcp and 8080 -> tcp
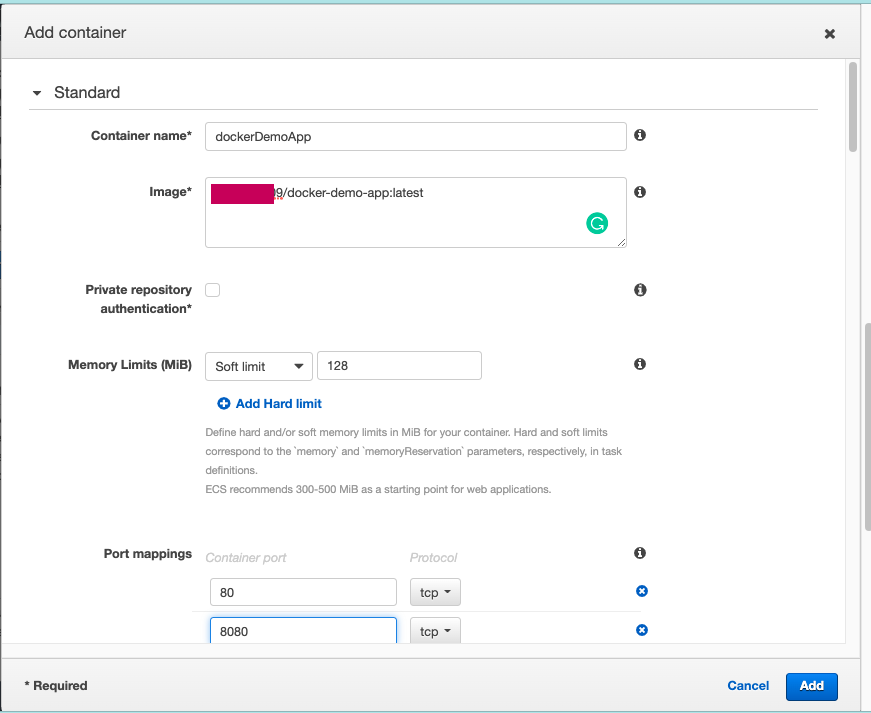 -- Click on Add to navigate back to Create new Task Definition page
Leave all other options and click on Create
Click on View task definition to see the created task definition details.
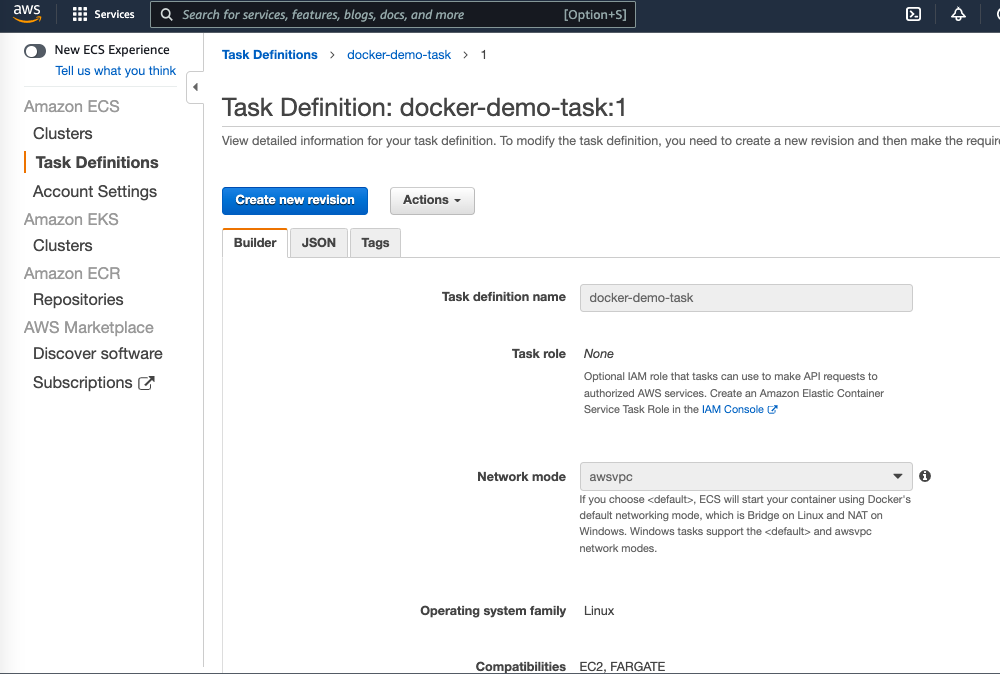
3. Run the Task Definition
In this last section, we are going to run our Docker container image.
Step 1
In the Task Definition: docker-demo-task:1 page, click on Actions then Run Task, the Run Task page will open.
Step 2
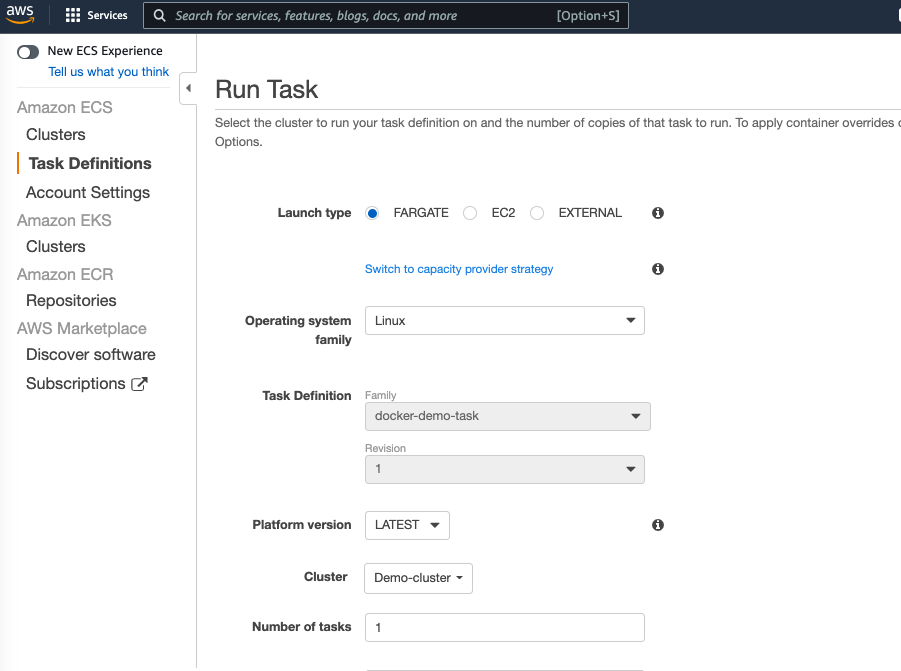
- Launch type : FARGATE
- Operating system family : Linux
- Task Definition : Familly -> docker-demo-task / Revision -> 1
- Platform version : LATEST
- Cluster : Demo-cluster
- Number of tasks : 1
- Cluster VPC : select your VPC
- Subnets : Choose un subnet
- Security groups : click on Edit to modify the default security group as follow :
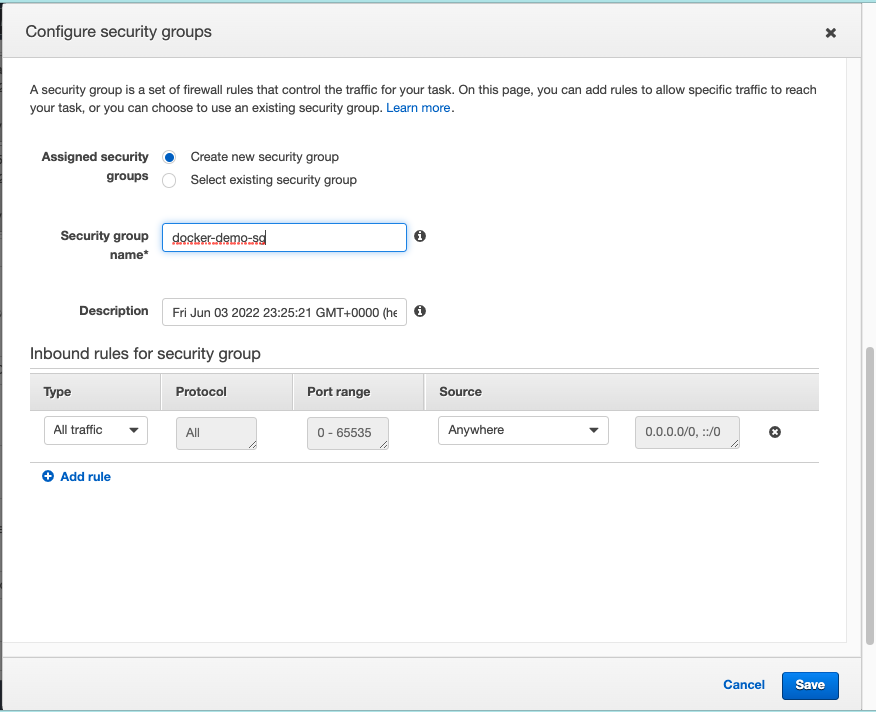 -- Assigned security groups : Create new security group
-- Security group name : docker-demo-sg
-- Inbound rules for security group: Choose All Traffic Type and Anywhere Source
-- Click on Save, and you will be redirected to the Run Task page.
Auto-assign public IP : ENABLED
Leave all other default options and click on Run Task.
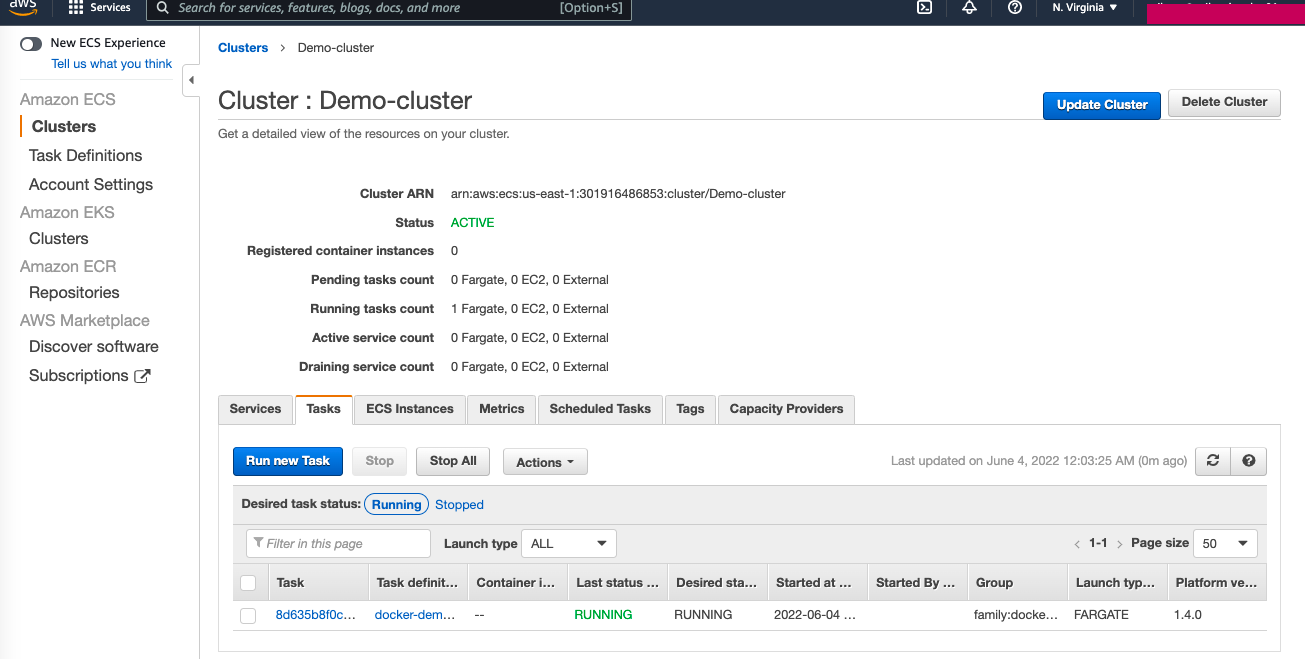
Access Spring Boot REST API via public address
Now that the deployed API's container is running, let's try to access it through a public IP address.
Step 1: Task details
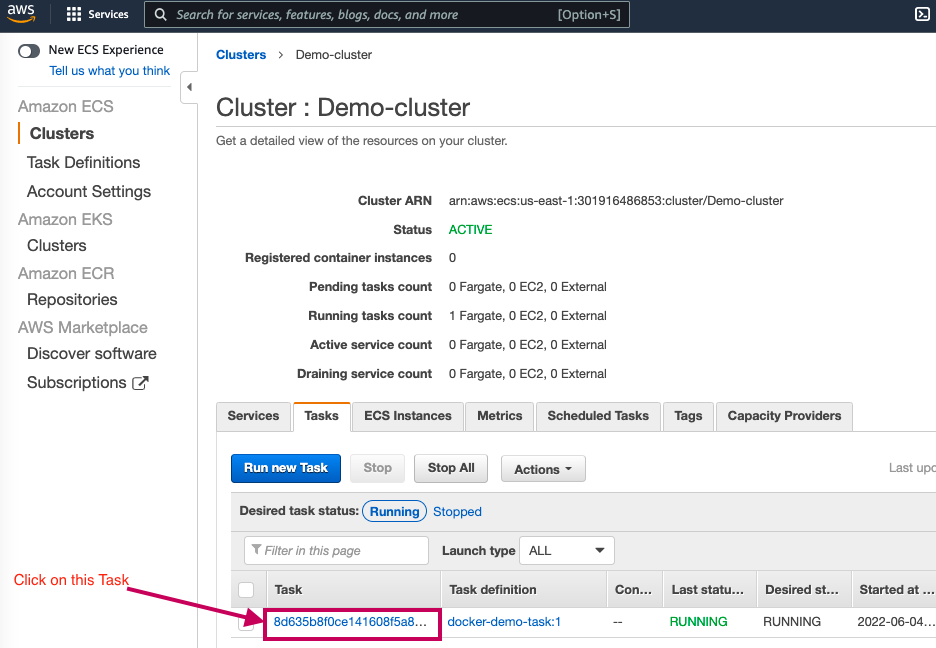
In the Demo-cluster details page, go to Tasks tab.
In the listed tasks, click on the Task whose Task definition column is docker-demo-task:1, and the Task details page should open.
Step 2: Task public IP address
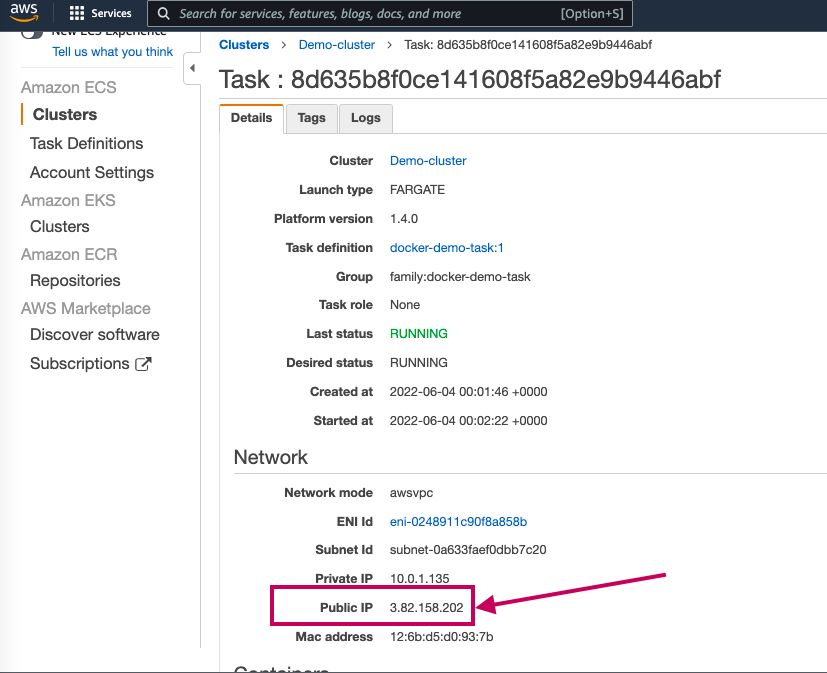
In the Task details page, copy the Public IP address
Open a browser or Postman, paste the IP address, and append the port and /api/ to see the magic happen!
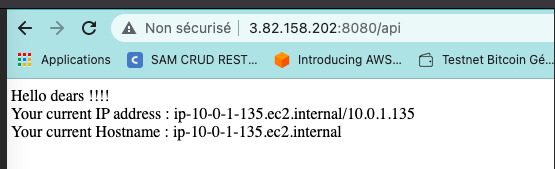
4. Clean up
- In the Task Details page, click on Stop
- In the Demo-cluster page, click on Delete Cluster then follow the instructions to delete the Cluster
In Summary
Through this post, we saw how to easily and quickly deploy a Spring Boot Application on AWS using AWS Fargate by creating a Spring Boot REST API Docker container image, pushing it on the Docker hub repository, creating and configuring Amazon ECS Cluster and Task definition witch helped us to deploy and run our REST API container image on AWS Cloud. Thanks for the reading.
About the author
Hello, I am a full stack developer since 2010 focused for a long moment more on backend stuffs. I embraced cloud development since 2019.
Comments
Join the discussionNo comments yet. Be the first to comment.