Hello,
In this tutorial, we'll set up the backend. What you'll learn here are:
- How to initialize a Spring boot app using the official Spring boot initializer and
- How to customize a spring boot app port.
Project set up
Our backend API will be named : Easytrans-api. Let's use Spring initializer to initalize the project.
Initialize the project
- Go to : start.spring.io
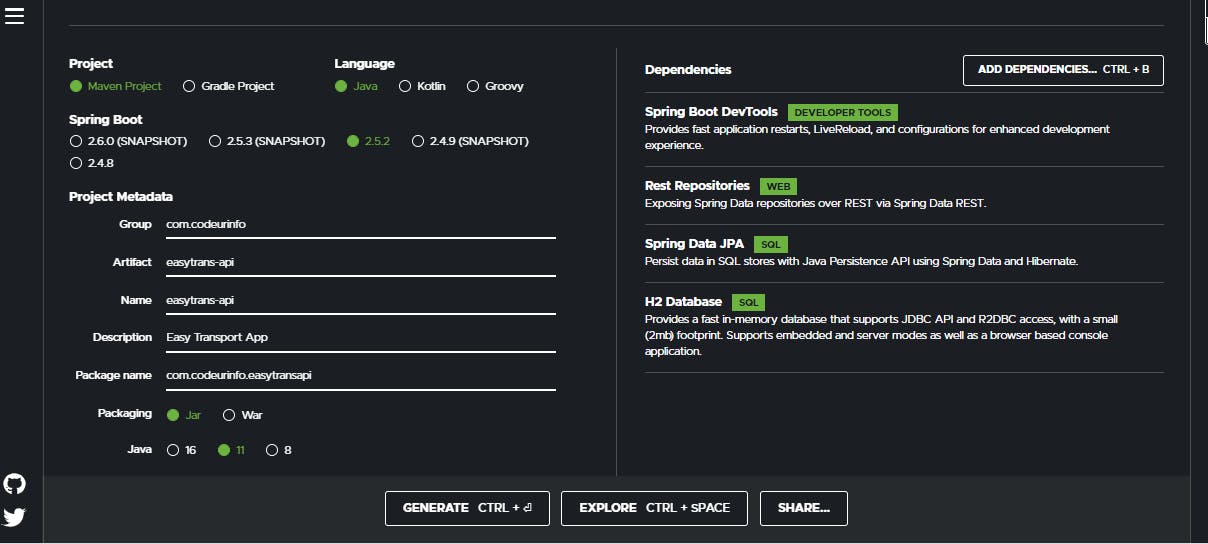
- Choose Maven Project , language Java, Spring boot version (2.5.2 while I am writing this article)
- In the Project Metadata section, type :
- Group name : com.codeurinfo; (reminder, conventionally, a maven group id is the project reverse domain name, here our domain name is : codeurinfo.com)
- Artifact : easytrans-api
- Name : easytrans-api
- Description : a beautifull description of yours
- Package name : com.codeurinfo.easytransapi
- Packaging : Jar (we'll make use of the embeded tomcat server in spring boot)
- Java : 8
4 . As for dependencies, we just need four, so in Dependencies section, hit ADD DEPENDENCIES ... and choose these below:
- Rest Repositories, for Spring Data Rest
- Spring Data JPA, for JPA
- H2 Database, embeded database
- Spring Boot DevTools
Everything must look like this picture:

You just need to hit GENERATE CTRL+ ... to generate the zip file of the project.
Now, unzip the zip file :) in your prefered directory and open it in your IDE.
Using VS Code, just open your editor and go to File -> Open folder then select the project folder.
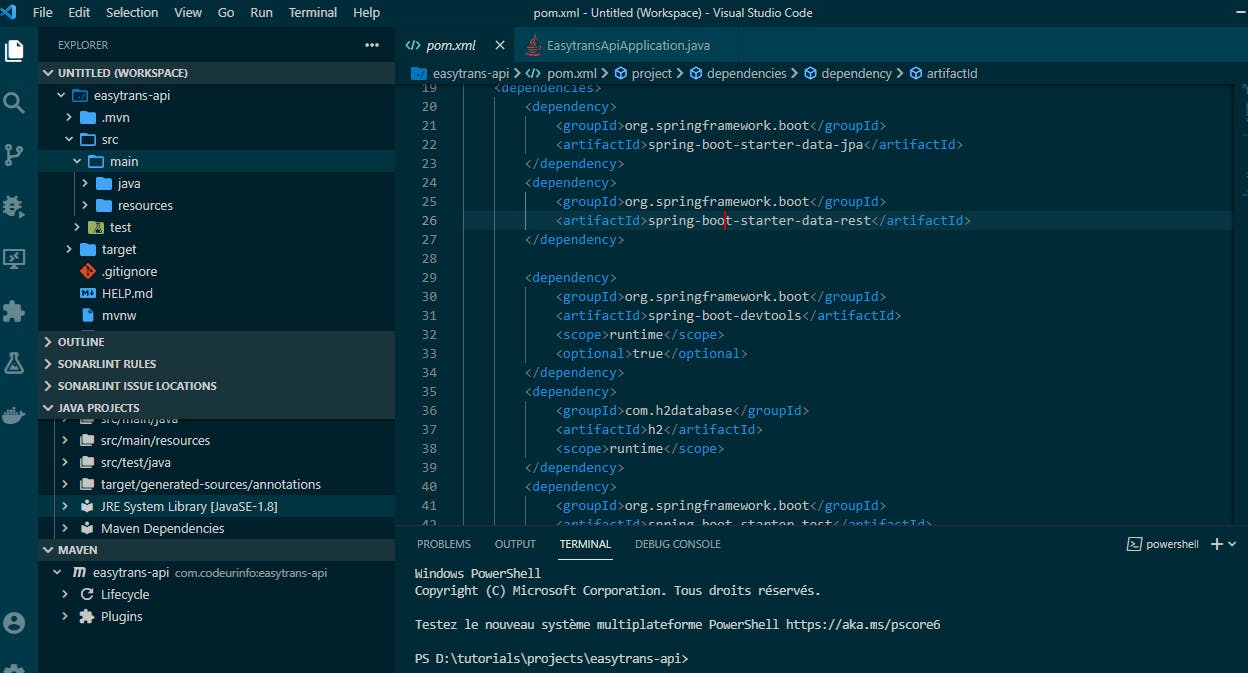
Our project is ready and must look like this:

Notice the 4 dependencies in the pom.xml file!
Test project
Our project is ready, before we run it, let's remove the application.properties file and add application.yml file in the src/main/resources folder.
Let's configure our app port to 9000. So, open the application.yml file and add the below code snipet:
server:
  port: 9000
Now we can run our app, in VS Code, you just open the main java class with @SpringBootApplication annotation and clic Run above the public static void main instruction.
As result, you must have a similar console:

Bravo, our backend is ready. Hope you've learnt something here, if yes please give a like to this tutorial and share it. In the next tutorial, we'll add entity classes and make REST call.

